
Hello Friends!!!
This week's posting is about the tweak of our coat closet.
I did not have a before pic, so borrowed it.

There was nothing wrong with the closet. It was just plain boring. The coats were hung and the back packs and lunch bags on the floor.
When I told suggested that we {always address "we" when its your idea} do something inside the closet, he had the face that read "inside a coat closet? who is gonna look in?". But he knew that I already had some plan and he better just go along with me.
When he did not say anything, I added further that I will just paint and add some hooks for the bags.
My plan was to paint horizontal stripes on the wall....it was all over the Blogland. Stripes on the walls looked doable and loved the look. I had to try in a smaller space first, so coat closet it is.....
Few week before my plan, I had been to Lowe's to pick something, I walked past the "oops" bin in the paint aisle. I never find anything that I would want but that day there was just one 1 Quart of dark grey paint. I was not sure if I wanted it. Then saw the price: $2.50. SOLD. Will find something to do, if nothing then its just $2.50.
Friday evening, I went and picked a gallon of white paint as my base color.
Saturday noon, I cleared the closet and started to paint it white. I did not bother to tape anywhere inside at this time.
Yes, I recruited Sanjan to paint the whole closet white. Talk about cheap labor.

Forgot to mention, I removed the switch plate too and covered it with tape.


I decided that I did not want to paint above the shelf. So I measured the height from bottom of the shelf to the base of the floor. I added the base board too. It was 70.5" tall. And I wanted the top and bottom stripe to be white. So after some calculation (I might have taken help of someone at home at that time) I went with 6.5" thickness of each stripes, there would be 6 white and 5 grey stripes.
I used my leveler to mark off every 6.5"
inches starting from the bottom of the shelf to the floor. I drew a small line with
pencil on each wall, one on each side.

Start taping the wall with blue painter’s tape and connect your pencil markings to create taped off stripes. To keep each stripe 6.5" wide, alternate the sides on which the tape is placed. Since my base coat was white, I taped on the "inside" of each line where the white stripes would be, making sure that there would be 6.5" of wall space for each grey stripe. Once you are done taping, you will notice that one stripe is wider than the other. You need to paint the wider stripe. Once you remove the tape both areas will have the same width.
Make sure to press the tape firmly to the wall to seal it and to avoid bleeding of the paint.

Yes, accidents did happen. Since it was still taped, I painted over the accidents with my base coat.


Pull the tape off from every stripe as soon as the second coat is done. The paint will still be wet but if you wait for it to dry, the paint will start peeling and you will see uneven lines.


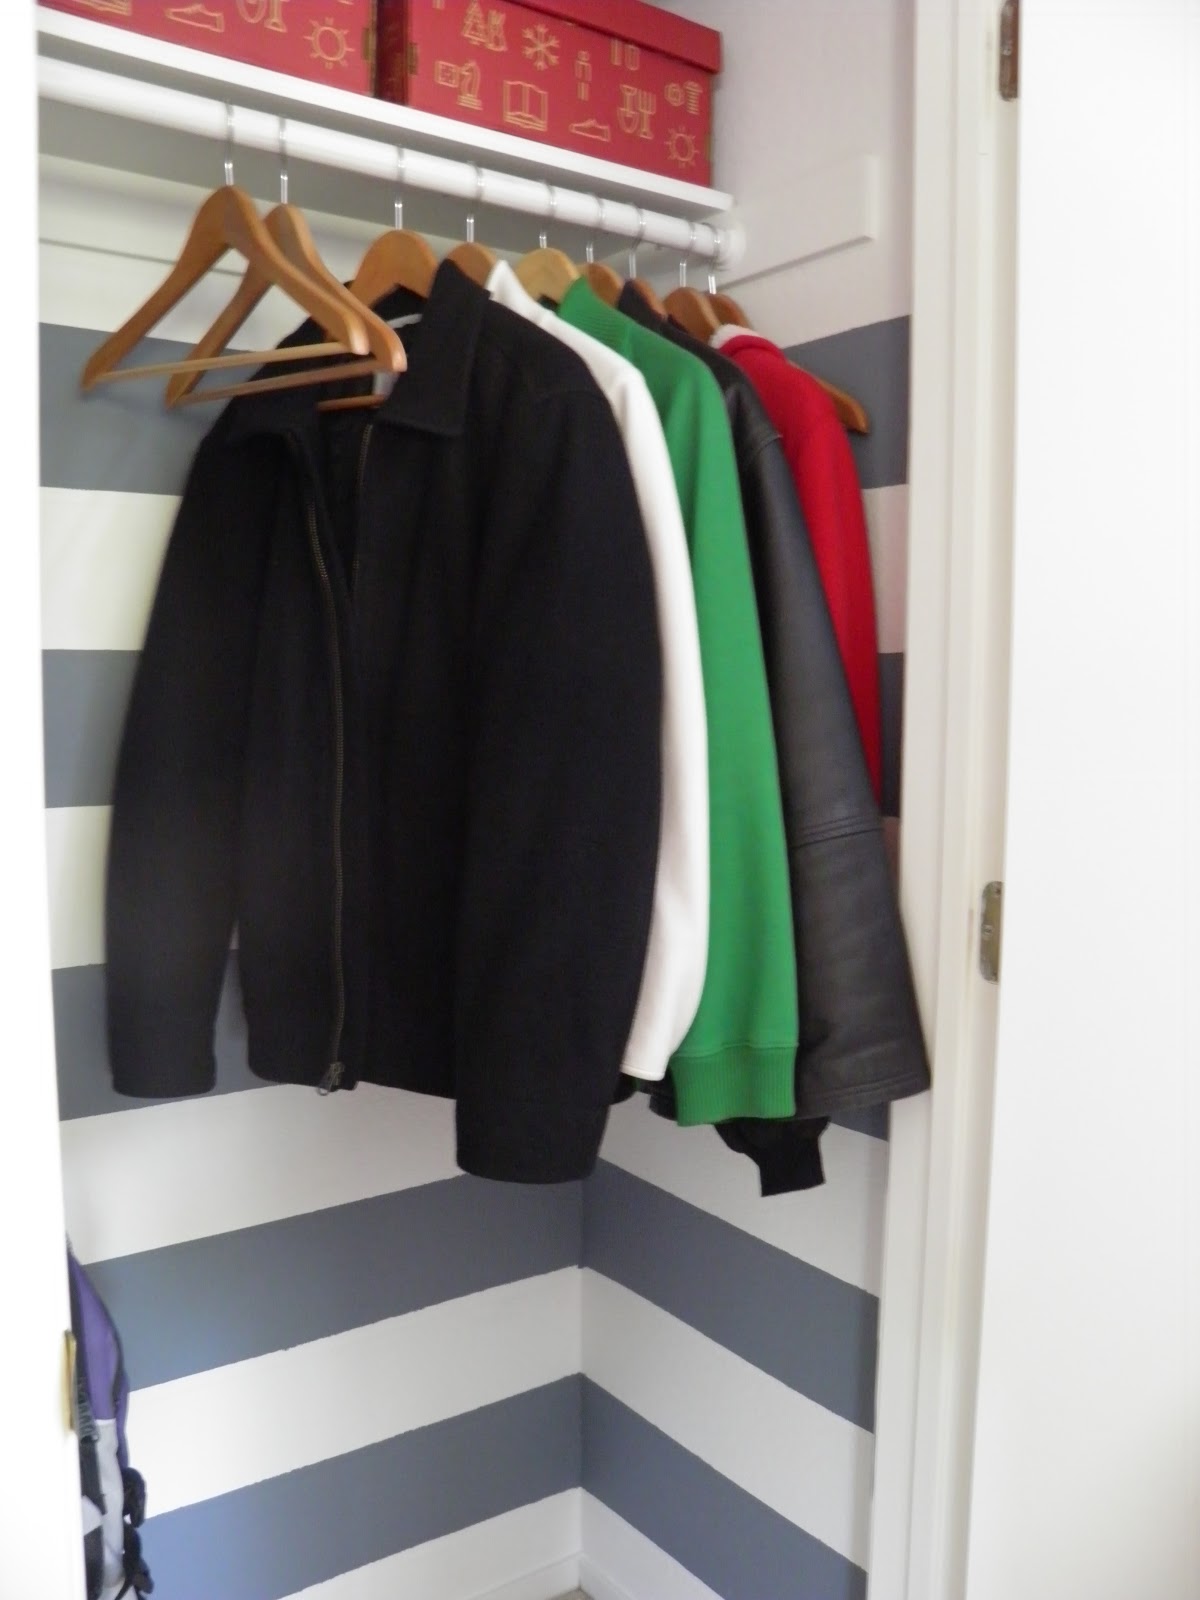
I had picked these 2 hooks from Lowes for .66 cents each on clearance. On the left side of the closet, I screwed them, one for lunch bags and below for the backpacks. Now the guys had no reason to keep their bags on the floor. (The green lunch bag is mine from World Market).


On the shelf, I had these two boxes from Ikea. One box has all the cables for the Camera, Camcorder, etc. The other one has blank CD/DVD's and empty cases.

There was no space to hang my handbag. So as a temporary solution, I added these 3M removal hooks on the inside of the door. Will update when I change to something permanent.
It took 4 hours to complete this project.

Supplies:
Base paint.
Accent paint. It can be lighter or darker to the base color.
Small paint roller
Paint tray
Paint Brush
Painter's tape
Leveler
Cost breakdown for our closet:
White paint: $26 (I bought one gallon since I could use for any project in future. I used less than half a gallon)
Grey paint: $2.50 (Oops bin, used only half of the quart)
Big paint roller and Tray:$0 (I had them)
Small roller and tray : $3 (Walmart)
Paint brush: $0 (I had it)
Blue tape: $5 (Walmart)
Hooks :$1.32 (.66 cents Lowes)
Leveler:$0 (I had it)
TOTAL: $37.82
Please feel free to post your comments.
I will be happy to answer any questions.
Thanks for visiting.
Reshma
Linking at: www.serenitynowblog.com
http://www.remodelaholic.com/2014/03/great-bathroom-makeovers/#
cool work - CM
ReplyDeleteThank you.
ReplyDeleteoh my!! I totally love what you've done.. How simple.. and inspiring.. You've given the closet a whole new look.. Wow!! Inspired.. and impressed... :)
ReplyDeleteThank you for sharing this on CD.. I'm following you now.. and am sure hoping to see loads more inspirations from you.. .:)
Hope you have a fabulous week ahead..
Patricia, I missed reading your comment. So sorry. Thank you so much for your comment and coming from a talented person herself means a lot. Thanks again.
DeleteWow! I am super impressed! A cute coat closet like that would inspire me to KEEP it organized!! heeheehee! I need all the help I can get int he organizational department.... :)
ReplyDeleteHave a very happy and creative week!!
hugs x, Crystelle
Crystelle Boutique
Thank you, Crystelle. I painted the closet almost 2 years ago and it still is very organized and we rarely dump anything in there....:-).
DeleteVery inspiring! Ive always wanted to try the horizontal stripe but knowing me, I would most likely botch it up..I need to find me one leveller..
ReplyDeleteMadhu, Even I did not trust myself I could do this but I read few blogs where the bloggers have great tutorials. So I tried first inside this closet, just in case I do not do a good job. Give it a try on a smaller section of the wall.
Deletethat looks great! i love the bold stripes and the storage on the left hand side. such a neat statement.
ReplyDeleteThank you. The closet was my trial project to see my stripes on the wall.
DeleteI enjoyedd reading your post
ReplyDelete